It would be best if you practiced a lot to pump up your skills in Counter-Strike 2, and doing it in a comfortable atmosphere with your friends is better.
To eliminate the random selection of fellow players, you must create your server or connect to an existing one to play with friends online.
Further we will consider all variants of how you can create a server in CS2, connect to a dedicated resource, add friends and much more.
- Finding and Joining Servers for 1 on 1 Matches
- How to Add to Friends in CS2
- How to Play with Friends in Counter-Strike 2
- How to Create a Lobby in CS2
- How to Close the Lobby
- How to Create a Server in CS2
- Radmin VPN
- Hamachi
- Dedicated Server
- Getting an ID
- Server on Existing CS2 Files
- Server on a New Steam Account
- Access the Server on Your Network
- Accessing the Server Via the Internet
- Connecting Other Users
- How to Invite a Friend to the Game
- In the Lobby
- On your Server
- How to Play 1 on 1 in CS2 with a Friend
- Basic Console Commands for 1 on 1 Matches
- Removing Bots from the Match
- Setting the Round Time and Freeze Time
- Infinite Ammo and Other Commands
- Solution of Possible Problems
Finding and Joining Servers for 1 on 1 Matches
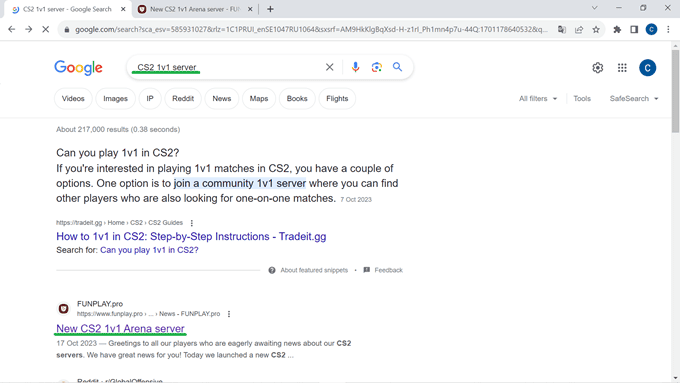
If you type the query “servers for 1v1 matches in CS2” in the browser search bar, the results will contain many links to resources that provide the opportunity to fight in duel mode.
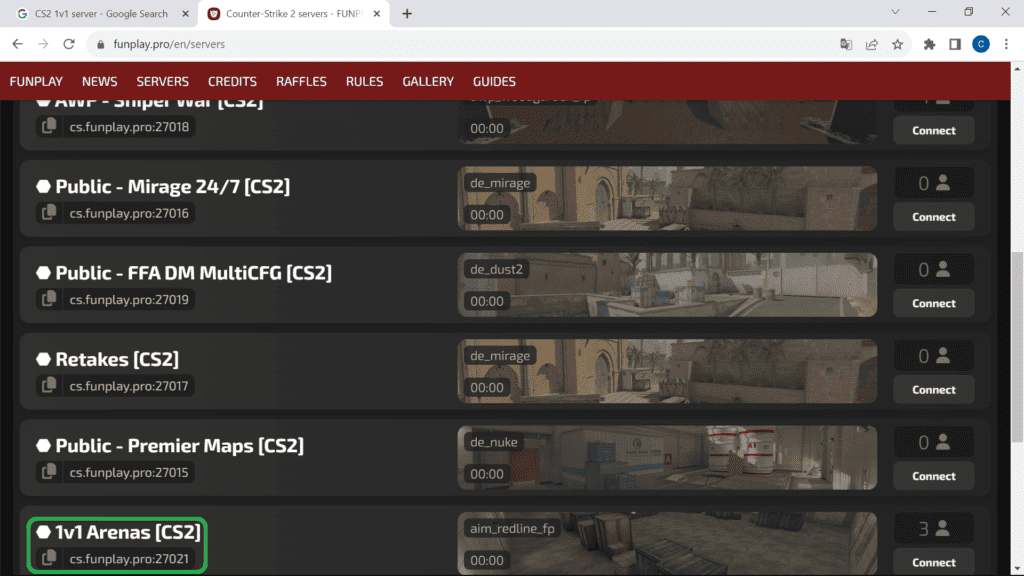
Go to the favorite service providing access to CS2 servers in 1v1 mode and guided by the site’s interface connected to the location of interest.
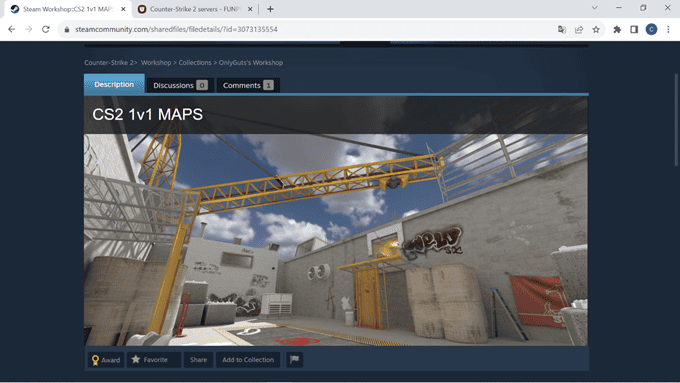
Steam Workshop presents many locations for playing in duel mode, connected to which you need to enter your account data.
How to Add to Friends in CS2
There are two ways to add a friend in CS2:
1. Use the contact list of fellow friends from recent fights in multiplayer mode, for which:
- open the drop-down menu by clicking on the little man icon in the upper right corner of the screen;
- select a person from the list of available contacts and send them a friendship request;
- in case of mutual consent, the list of friends will be enlarged.
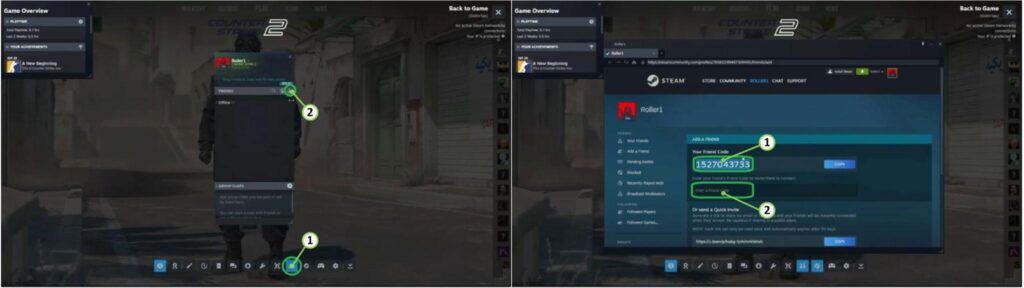
2. Send a request to a specific person by following the steps below:
- Press the Shift-Tab key combination.
- If you are registered in Steam, a menu opens, in which you go to the “Friends” tab (1) and click on the “+” icon (2).
- In the window that appears, there are two lines: the upper (1) – contains a code you can send to another player to connect you as a friend, and the lower (2) – is designed to enter a set of characters received from another user.
- After entering the code received from a fellow player in the lower line (2), you can send a request to them.
- After confirmation, the user will be added to the friends list.
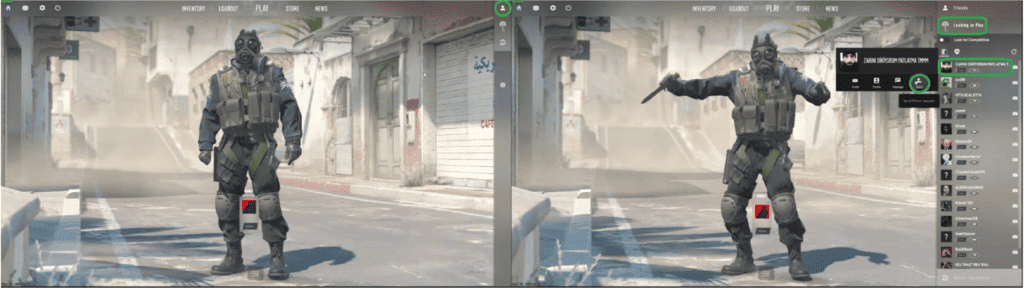
How to Play with Friends in Counter-Strike 2
There are the following options for playing CS2 with friends:
- Create an official lobby to play in one of the modes:
- Premier – global player ranking, 5×5, up to 13 wins, map selection by consecutive draws;
- Competition – similar to Premier, except for the ability to select a card;
- Partnered – 2×2 duel on a small map;
- Standard – 10×10 battle for 4 minutes up to 8 wins;
- Deathmatch – the one with the most kills in a 10-minute duel wins.
- Connect the closed server through the developer console, accessible through the game settings menu.
- Connect to one of the many third-party servers.
- Create your dedicated server with limited access.
How to Create a Lobby in CS2
To be able to create a lobby in Counter-Strike 2, the following conditions must be met:
- have the game installed, purchased, or downloaded through Steam;
- add your friends to the list;
- complete several random matches to unlock the possibility of creating a lobby.
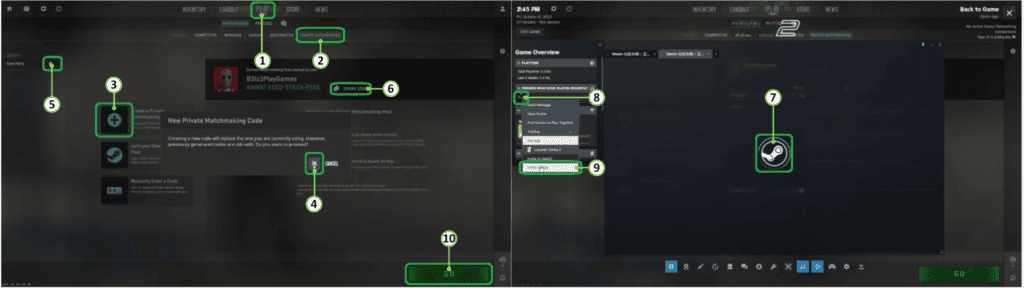
After gaining access, the following steps will be required:
- Go to the Play tab (1) from the main menu.
- Select private matchmaking (2).
- If the button to create a private lobby (3) is gray, the required number of qualification duels has not been passed.
- If the icon (3) color is blue, click on it and generate the code for a new private lobby (4).
- If you want a free connection, move the switch (5) to the right; otherwise, you must give out the password individually (6).
- Turn on the Steam connection menu (7) by pressing Shift Tab.
- Click on the icon of a friend (8) and select “Invite to game” in the drop-down list (9).
- After creating the lobby, customize its settings and start the arena by pressing the “Go” button (10).
How to Close the Lobby
A closed lobby can be created in two ways:
- Do not open access when creating it; leave the switch (1) in the inactive gray status.
- Close the free event connection by sliding the switch (1) from the active green status to the left.
- If the lobby needs deactivation, click the “Cancel Search” button and close it.

How to Create a Server in CS2
Counter-Strike 2 interface provides for creating your server for this purpose:
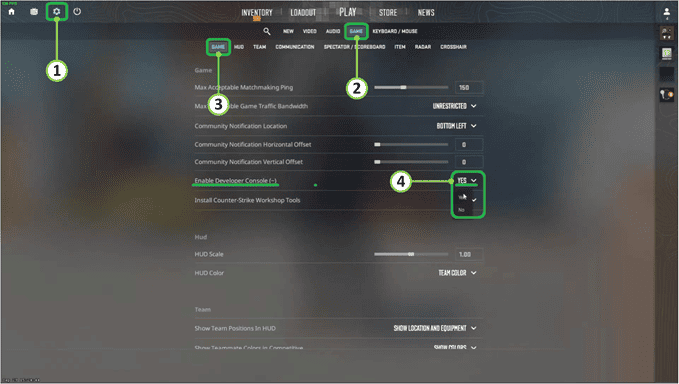
- Enable the developer console by doing the following:
- go to the game settings by clicking the icons (1), (2) and (3);
- select “Yes” (4) next to “Activate Developer Console”.

- Open the Developer Console (by default the “~” key, unless otherwise specified in the keyboard settings).
- Type “map map name” in the command line.
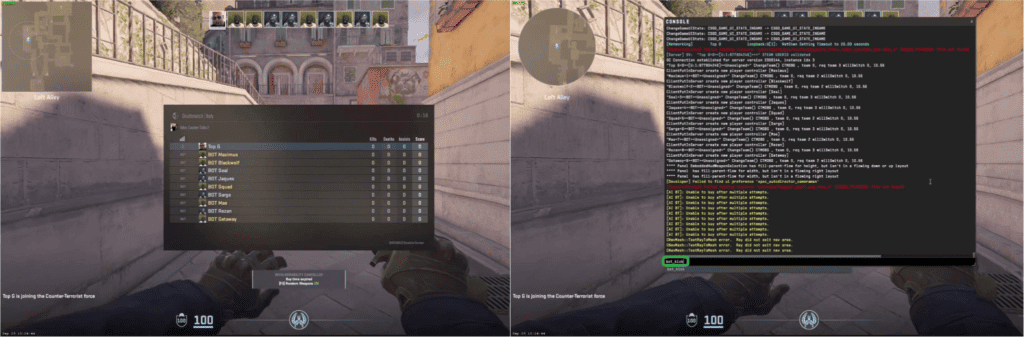
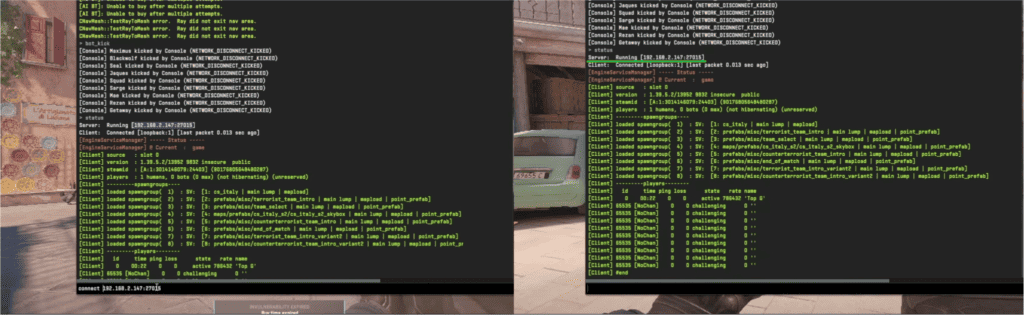
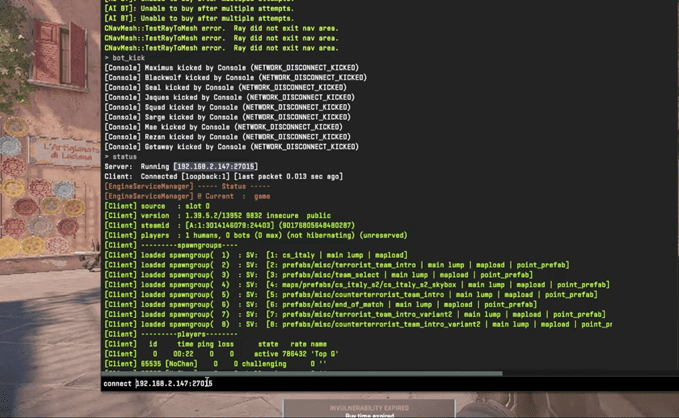
- Once in the appropriate location filled with bots, type “bot_kick” in the console and free the map from intruders.

- To invite a friend, you need to:
- enter the command “status” in the console;
- find the IP of the server and copy it;

- send the received address to your friend so that they can type “connect IP” in the command line;
- and then the connection will be created.

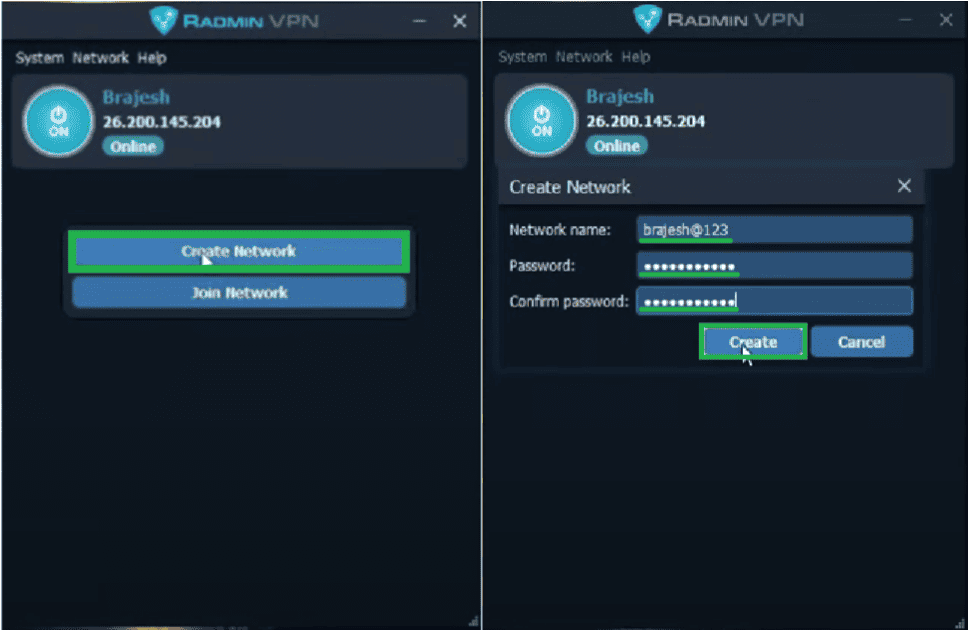
Radmin VPN
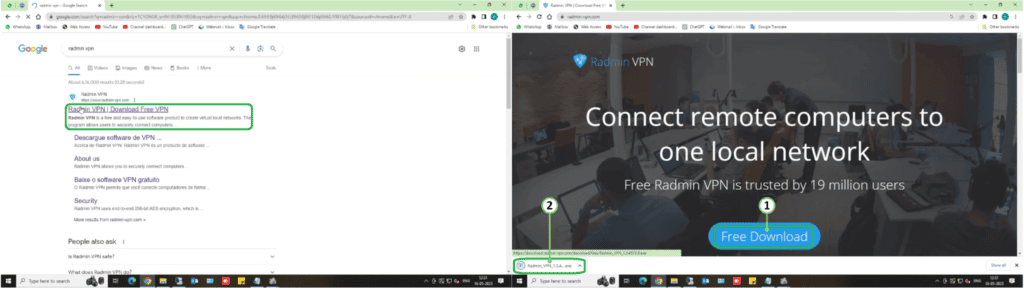
The easiest option to change the server in CS2 is to use a third-party one, such as the Radmin VPN application.
You will need to do the following:
- Find the developer’s official website in your browser, go to it, and download the distribution (1).
- After the executable file download, click on it and install the program (2).

- Launch Radmin VPN, click the “Create Connection” button and enter its parameters:connection name;
- password and its confirmation.
- When you have finished entering, click “Create”.

- Share the parameters of the created server with a friend because they also need to install Radmin VPN.
- After installation and startup, the invited user will need to:
- click on the “Connect to the connection” button;
- enter the server name and password;
- click “Join”.

- After both participants are connected to the Radmin VPN:
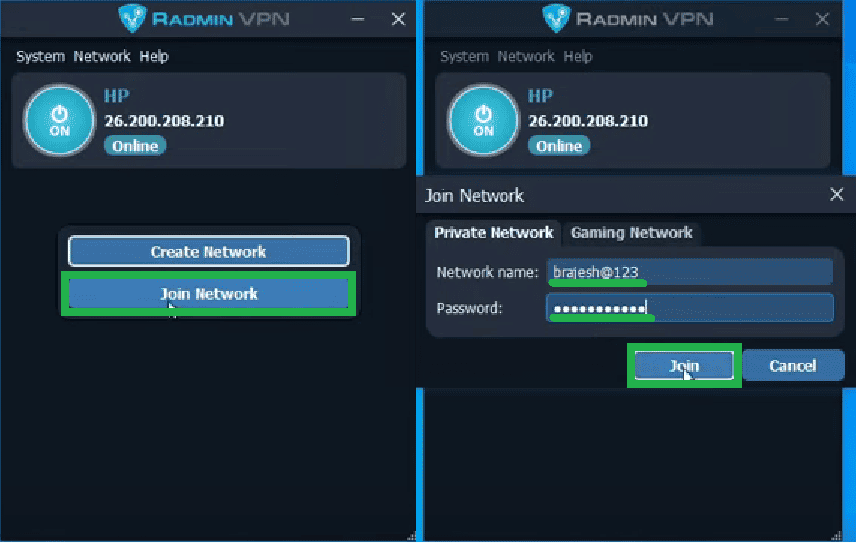
- the master (host) starts CS2 and creates a server with bots;
- the connected player launches the developer console (default key “~”) and enters “connect[IP connection from Radmin VPN]”.
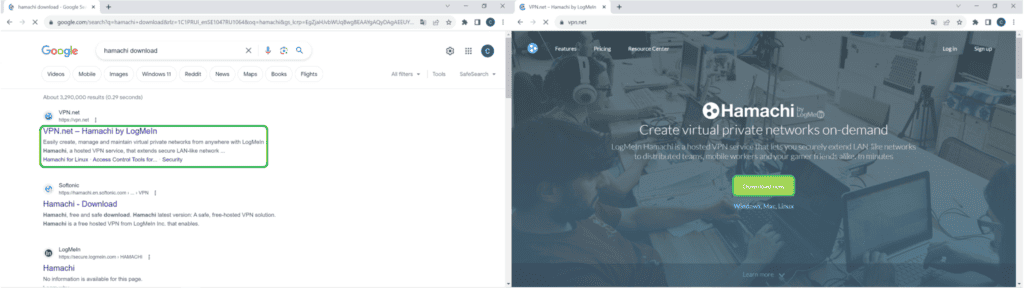
Hamachi
An alternative way to create a server using VPN is to use the Hamachi application, for which:
- Find a link to the official developer’s website in a search engine, follow it, and download the executable file.
- Go to the directory with the installed game, find the startup file (by default cs2.exe), and create its shortcut.
- Right-click on the shortcut, open its properties, and add to the object description: “-dedicated -usercon +game_type 0 +game_mode 1 +map de_inferno -dev”.
- Save the changes.
- Similar to Radmin VPN:
- the master (host) needs to create a password-protected connection and save the IP;
- the connected player should join the connection by entering the received data.
- Start the server from the previously created shortcut.
- Go to CS2, open the developer console and type “connect[IP connection from Hamachi]:27015″.
- Press enter and connect; invited users can join similarly.
- Console commands will not work when typing them in CS2; you need to enter them in the open window of the running server.
Dedicated Server
Creating a dedicated server for CS2 is the most complex method, which provides independence from third-party resources.
There are two options:
- This is for the installed version of the game and an existing account.
- With the installation of an additional CS2 version, create a second profile.
IMPORTANT: If you choose the option based on installed files, you will not be able to use the game in normal mode as long as the server is connected.
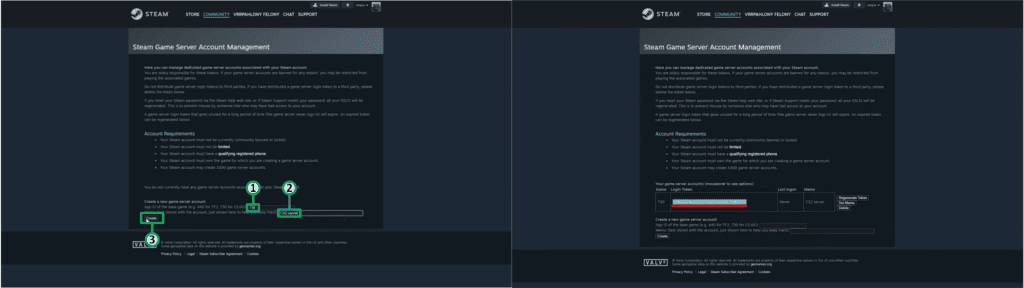
Getting an ID
First of all, let’s analyze the issue of obtaining the server ID, which will be helpful to further on:
- Go to the Steam server account management page, which you can use if:
- steam account is not blocked and has unlimited rights;
- there is a linked phone number;
- counter Strike 2 is installed.
- Enter 730 in the application ID in the corresponding line (1).
- Set the server name (e.g. CS2 server) – (2).
- Click “Create” (3).
- Copy the resulting ID for use when replacing in the future.
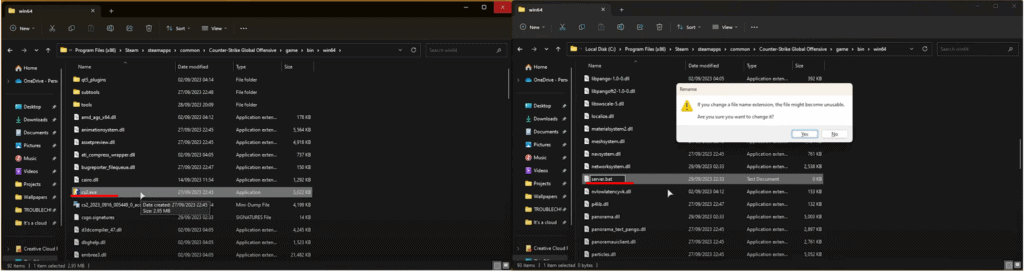
Server on Existing CS2 Files
If using an installed version of CS2 and an existing Steam account:
- Locate the cs2.exe file, which should have the following path: “[Installation Directory]\game\bin\win64\cs2.exe”.
- In this folder, create a text file (.txt) and rename it to “server.bat”.

- Open the new executable file in edit mode with any convenient application and insert the following code:
cd “[Full path to cs2.exe file]”
start /wait cs2.exe -dedicated -usercon -console -secure -dev +game_type 0 +game_mode 1 +sv_logfile 1 -serverlogging +sv_setsteamaccount <SERVER_ID> +map de_inferno +exec server.cfg
- Open the new executable file in edit mode with any convenient application and insert the following code:
- Copy the full path to the startup file from Explorer instead of inserting the identifier generated earlier (see Obtaining an identifier).
- Save the changes in the file “server.bat”; if you click on it twice, the server will start.

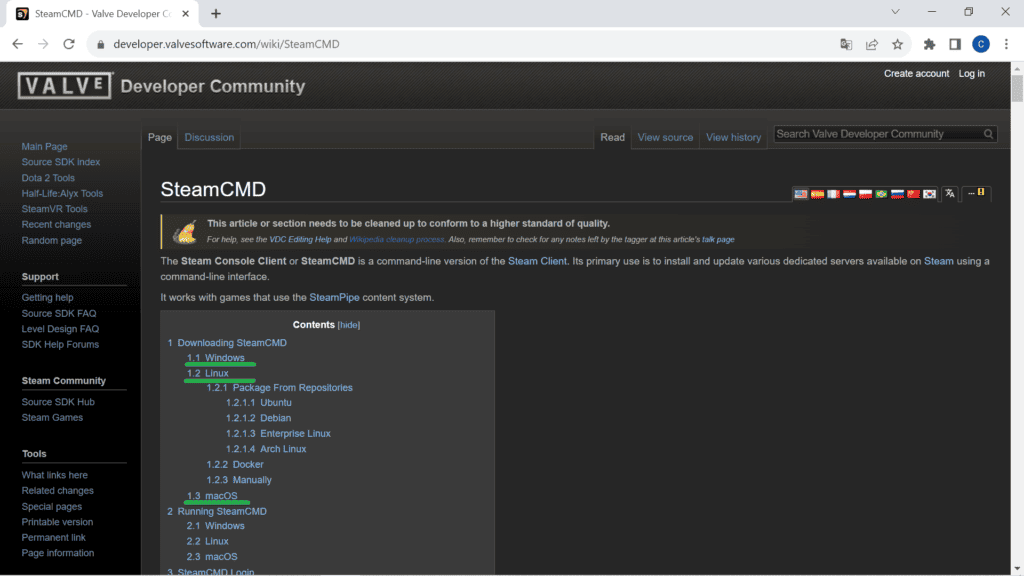
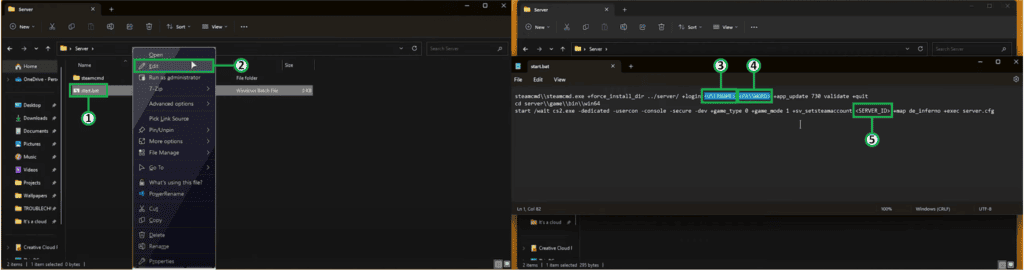
Server on a New Steam Account
The sequence of actions is as follows:
- Download SteamCMD from Valve’s website for your installed operating system (Windows, Unix. macOS).

- Extract the archive to the future server “server” directory, in the folder “steamcmd”.
- In this folder, create a text file (.txt), rename it to “start.bat” (1), and open it in a text editor (2).
- Copy and paste the following code:
steamcmd\\steamcmd.exe +force_install_dir ../server/ +login <USERNAME> <PASSWORD> +app_update 730 validate +quit
cd server\\game\\bin\\win64
start /wait cs2.exe -dedicated -usercon -console -secure -dev +game_type 0 +game_mode 1 +sv_logfile 1 -serverlogging +sv_setsteamaccount <SERVER_ID> +map de_inferno +exec server.cfg - In code:
- <USERNAME> and <PASSWORD> – name and password of a new Steam user to be created or enter data of an existing account;
- <SERVER_ID> – server identifier generated earlier (see Obtaining an identifier).

- Install SteamCMD by running the executable file.
- Once complete, you should see CS2.exe at ~\server\game\bin\win64\cs2.exe.
- Now, you can double-click on “start.bat” and start the server.
Access the Server on Your Network
If the other player(s) are in the same network, that is, have a connection to the same router, then to get access to the dedicated server, you need:
- Allow access via firewall and antivirus by opening ports 27015 and 27016;
- Share the IP address of your computer with your friends and specify the ports.
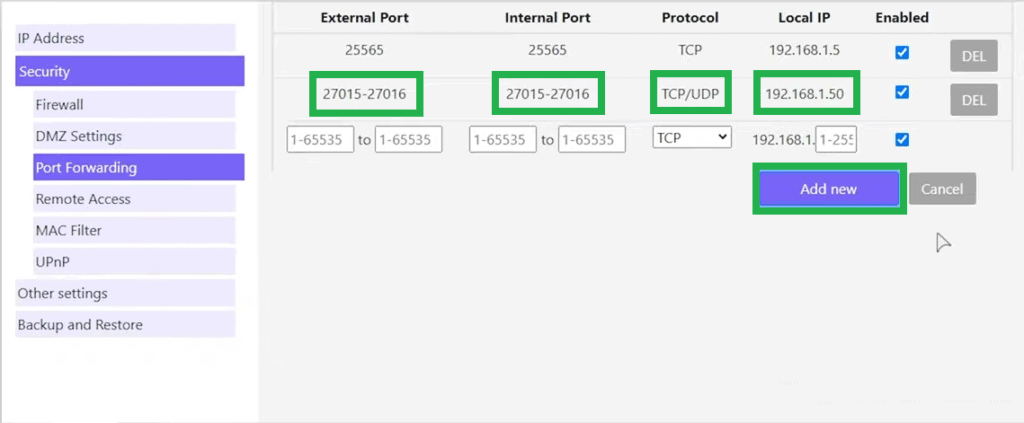
Accessing the Server Via the Internet
To allow friends to connect via the global network, you will need to configure a router:
- Enter the menu, select the “Security” section, subsection “Port Forwarding”.
- Specify ports 27015 and 27016 (with “,” or “-“) as external and internal.
- Select the TCP/UDP protocol.
- Specify the local IP of your computer.
- Click Add.
The dedicated CS2 server should now be accessible.
Connecting Other Users
There are two possibilities for connecting to a dedicated server:
1. Through the game menu, to do so:
- go from the main menu to the “Game” section (1);
- successively click on server search (2) and confirmation (3);
- activate the “LAN” tab (4), where the created server should be displayed;
- click on the line with the active connection (5) and connect to it (6).
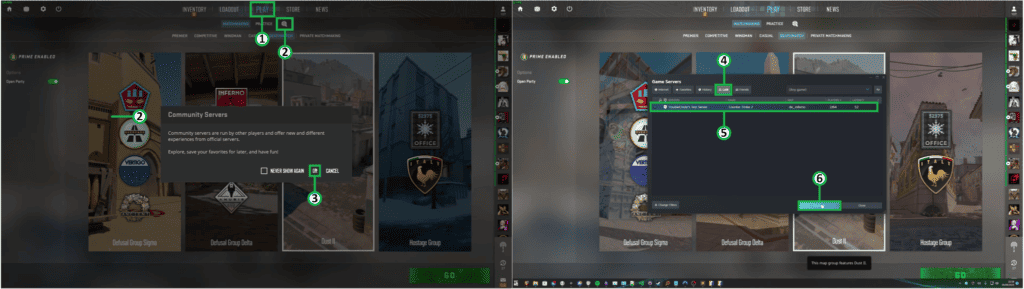
2. Via the developer console, to do what:
- open the console by pressing the “~” key;
- enter the command “connect[server IP:port];
- Press enter.
How to Invite a Friend to the Game
Another user must be invited and connected via the lobby or server to join a local fight.
In the Lobby
To invite an opponent to the lobby, select them from the list of added friends, send a request, and wait for connection confirmation.
On your Server
To connect to a dedicated server, another player will need to:
- find the connection in the appropriate section of the menu (Game/Server Search/LAN);
- know its IP and ports to connect via the developer console.
How to Play 1 on 1 in CS2 with a Friend
To play in duel mode, you need to create a server using one of the above methods:
- using Radmin VPN;
- using Hamachi;
- by creating a dedicated resource.
After creating a server, you can connect to it and play in duel mode, disabling bots.
Basic Console Commands for 1 on 1 Matches
Duel mode is not a ranking event in CS2, so it can use console commands that facilitate the game and increase training efficiency.
Any command is entered through the console, but if the built-in one does not work, it is necessary to repeat the action in the window of the running server:
- Radmin VPN;
- Hamachi;
- dedicated resource.
In order for the console commands to work, you must first of all type and enter “sv_cheats 1”.
Removing Bots from the Match
You can get rid of computer opponents in different ways:
- bot_kick – removes bots from the given arena;
- bot_kick ct – removes bots from the arena; bot_kickct – removes only special forces;
- bot_kick t – bots leave the location;
- bot_kill – kills bots;
- bot_stop – computer opponents hang in one place.
Setting the Round Time and Freeze Time
Commands regulating time parameters:
- mp_roundtime – allows you to change the duration of the duel;
- mp_freezetime – adjusts the duration of freezing at the beginning of the round.
Infinite Ammo and Other Commands
The following commands are also of interest:
- sv_infinite_ammo 2 – allows you not to care about reloading;
- noclip – will enable you to fly;
- sv_grenade_trajectory_prac_pipreview 1 – shows the flight path of the thrown grenade and activates a separate camera showing the place of its landing;
- mp_maxmoney 14000 – allows you to set the maximum cash (in the example $14000);
- mp_startmoney 6000 – gives a specified amount of money at the beginning of the game ($6000).
Console commands in CS2 are not limited to this, their number exceeds 150 pieces and deserve a separate consideration.
Solution of Possible Problems
The following problems may occur in 1v1 network mode:
- CS2 session is full – typical when trying to log in through the training mode, which does not provide for the possibility of organizing a duel;
- lobby invitation does not come – check if the “Invisible” mode is disabled, log out of Steam and log in again;
- unable to invite a friend to the lobby – the connection is not included in the firewall and antivirus exclusion list;
- The game slows down in the lobby – the VPN is connected, and the nearest servers are full.