Counter-Strike 2 has captured the attention of gamers from all over the world since its introduction in the gaming industry. Professional players and amateurs began looking for options to simplify gameplay.
Counter-Strike 2 has one popular bind – bunny hop, which professional players customize on the mouse wheel. It should be taken into account on official servers. The value determining the delay’s speed between actions may differ from CS:GO. In this article, we will tell you how to correctly bunny hopping with the help of scrolling the mouse wheel.
Some users managed to customize the jump on private servers by exposing settings from the last part of the game, allowing them to show better results in matches. In the next update, the developers may change the bunny hopping system.
In any case, the bunny hop on the scroll wheel remains a necessary feature for players who are used to using it instead of the standard spacebar.
Enabling the Counter-Strike 2 console
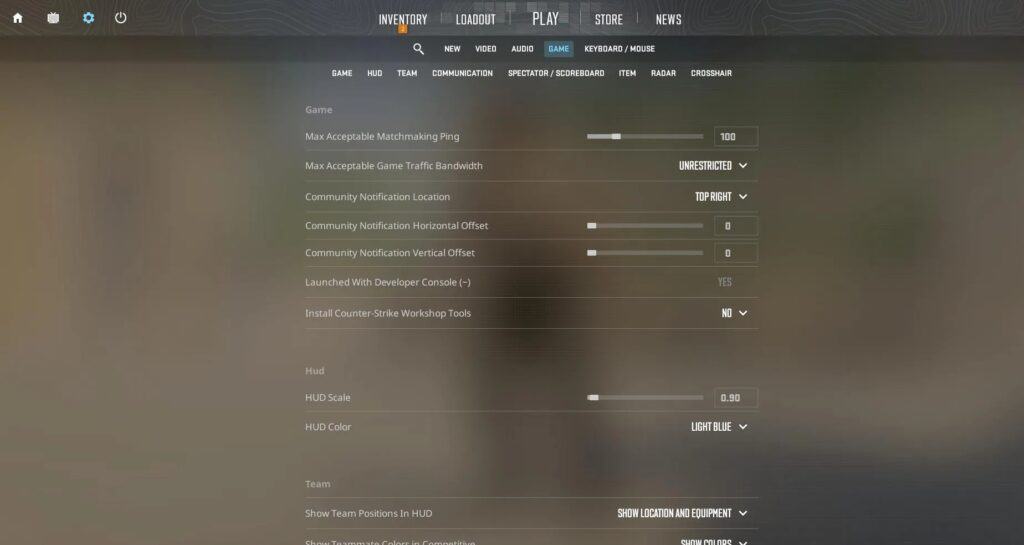
Before you can enter commands, you need to enable the console. To do this, you need to go to the game settings and follow the path:
- Game;
- Enable developer console;
- Yes.
Now, we can take advantage of this feature. By default, it is activated by the “~” key.
How to enable CS 2 wheel jump
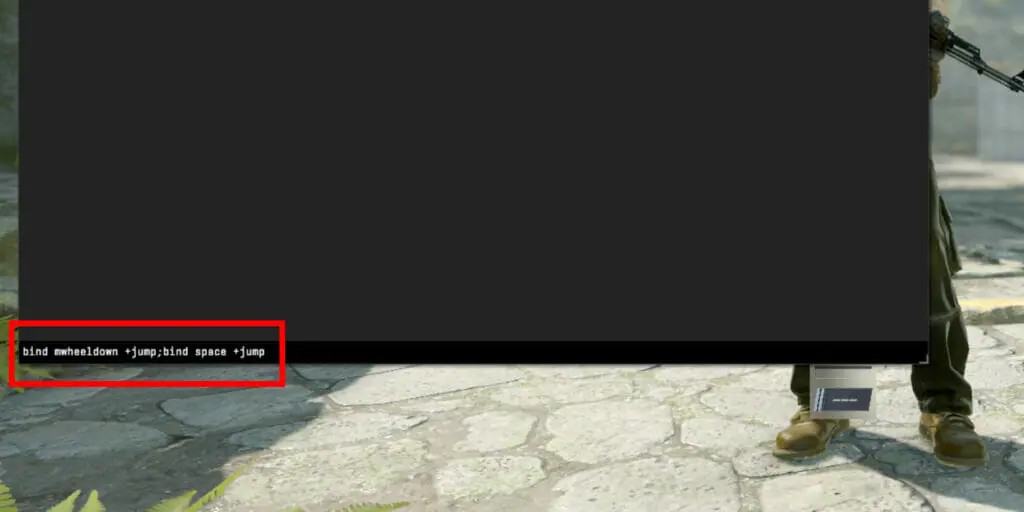
Turn on the console on the ~ key. Write the command that best suits you in the window:
- Bind “mwheeldown” jump; bind “mwheelup” jump; bind “space” jump (up/down mouse wheel jump and space). In this option, you will customize the action to scroll up and down.
- Bind “mwheeldown” jump; bind “space” jump. If you want to set the action to scroll down, do not use this command.
- Bind “mwheelup” jump; bind “space” jump. This command customizes the action to the space bar.
Customization via game parameters
- Open the game settings and go to the “Keyboard and Mouse” section.
- Scroll through the settings to the “Movement” section.
- Select the “Jump” option and set this setting on the mouse wheel.


